
To prevent moldafter water damage, act within 48 hours by removing all standing waterwith pumps or wet vacuums. Maintain indoor humiditybetween 30-50% using dehumidifiers and fans for proper ventilation. Discard saturated porous materials like drywall and carpeting, and thoroughly clean all surfaces with EPA-registered disinfectants. Monitor moisture levels continuously with testing tools. For water damage exceeding 10 square feet, professional remediation servicesoffer specialized equipment and techniques for complete protection.
Key Takeaways
- Remove all standing water within 24-48 hours using pumps or wet vacuums to prevent mold spores from activating.
- Deploy dehumidifiers to maintain humidity levels between 30-50% and create cross-ventilation with strategically placed fans.
- Remove and discard wet porous materials like drywall, insulation, carpeting, and upholstery that cannot be completely dried.
- Clean all affected surfaces with soap and water, followed by EPA-registered antimicrobial disinfectants specifically formulated for mold prevention.
- Monitor humidity levels twice daily and apply mold-inhibiting products to vulnerable surfaces after complete drying is achieved.
Act Fast: The 24-48 Hour Critical Window

The first 48 hours after water damageare absolutely critical for preventingmold growthin your home. Mold spores can begin colonizing wet surfaces within 24 hours, making rapid assessment of the affected area your top priority.
Your emergency response should focus on removing standing waterimmediately using pumps or wet vacuums.
Next, thoroughly dryall affected surfaces with dehumidifiers and high-powered fans. Don’t forget hidden moisture pockets in subflooring, behind baseboards, or inside wall cavities.
During this critical window, you’ll need to remove saturated materialsthat can’t be properly dried, including carpet padding, drywall, and insulation. These items become ideal breeding grounds for mold if not addressed promptly.
Document everything for insurance purposeswhile you work, taking photos before, during, and after your cleanup efforts.
Remember that professional water damage specialists can provide industrial-grade equipment and expertise if the damage is extensive.
Extract Standing Water Completely
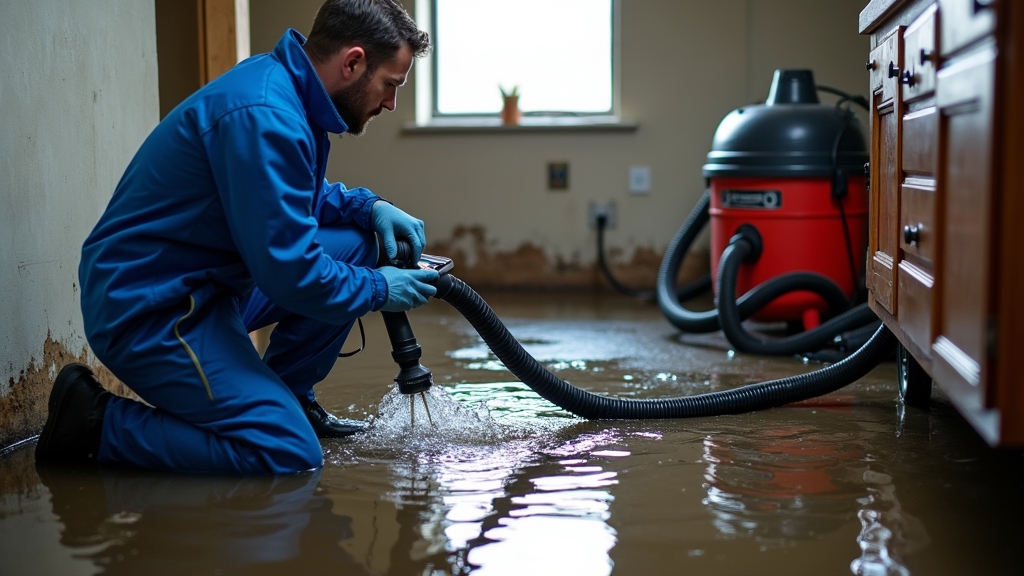
Removing every drop of standing waterconstitutes your highest priority in mold prevention efforts. Complete water extraction prevents mold spores from activating and multiplying in your home.
Standing water serves as the primary catalyst for fungal growth, with each hour of moisture contactincreasing your risk of extensive contamination.
For effective water extraction, utilize these essential tools:
- Submersible pumps for deep water removal (over 2 inches)
- Wet/dry vacuums for thorough surface moisture collection
- Commercial-grade air movers to accelerate evaporation in carpets and porous materials
Don’t overlook hidden water pocketsin wall cavities, under flooring, or within insulation. These concealed moisture reservoirs often cause the most persistent mold problems.
If you’re dealing with significant flooding, consider professional extraction services equipped with moisture meters and thermal imaging to detect water you can’t see.
Complete extraction now prevents thousands in remediation costslater.
Dehumidify and Ventilate Affected Areas

After extracting water, you’ll need to deploy commercial dehumidifiersstrategically throughout the space to pull moisture from both the air and materials.
Create cross-ventilationby positioning fans at opposing windows or doorways, forcing damp air outside while drawing in fresh air.
Monitor humidity levels with a hygrometer, aiming to maintain readings between 30-50% to effectively prevent mold growth in the affected areas.
Use Commercial Dehumidifiers Effectively
Once water damagehas occurred, commercial dehumidifiersbecome your most powerful allies in preventing mold growth.
Strategic dehumidifier placement maximizes moisture removal efficiency, dramatically reducing the timeframe when mold can establish itself. Position units in the center of affected rooms for general drying or directly target saturated materials for concentrated moisture extraction.
For best results:
- Maintain room temperature between 70-80°F to enhance dehumidification capacity
- Empty collection tanks regularly or establish continuous drainage systems to prevent automatic shutoffs
- Keep doors and windows closed during operation to create a contained drying environment
Monitor humidity levels using a hygrometer, aiming for 30-50% relative humidity.
Commercial units can extract 50-100 pints daily compared to residential models’ 10-20 pints, making them essential for significant water damage scenarios requiring rapid moisture removal.
Create Cross-Ventilation Airflow
Creating effective cross-ventilation airflowserves as an essential complement to dehumidification in your battle against mold development.
Position box fansin opposing windows—one pulling air in, the other pushing air out—to establish ideal airflow management throughout the affected space. For multi-room scenarios, create a pressure gradientby closing doors to unaffected areas while establishing air movement pathsfrom dry to wet zones.
Strategic window and door positioning maximizes cross ventilation techniques, especially during the day when outdoor humidityis lowest.
Remove obstacles blocking air pathways and consider using ceiling fans to enhance vertical circulation. For spaces without windows, create artificial airflow patterns using strategically placed fans that direct air toward exhaust points.
This systematic approach accelerates moisture evaporationand prevents stagnant pockets where mold spores typically colonize.
Monitor Humidity Levels
Maintaining precise humidity monitoringforms the cornerstone of effective mold preventionafter water damage. You’ll need to keep indoor humidity levels between 30-50% to inhibit mold growth. Invest in a quality hygrometerto track moisture levels in affected areas, especially basements, bathrooms, and previously damaged spaces.
For effective humidity control, implement these moisture management strategies:
- Position dehumidifiers in water-damaged areas, emptying collection tanks regularly or connecting to drainage systems.
- Establish a humidity monitoring schedule—check levels at least twice daily until readings stabilize.
- Create humidity zones by closing off unaffected areas from damaged spaces to concentrate dehumidification efforts.
Remember that humidity levels fluctuatethroughout the day, so continuous monitoring provides the most accurate picture of your moisture management progress.
Consistent attention to these details greatly reduces your mold risk.
Remove and Discard Saturated Materials
You must quickly differentiate between porous materials(like drywall and insulation) that typically can’t be salvaged after water saturation, and non-porous materials that often can be cleaned and dried.
When waterlogged, porous building materials become ideal breeding grounds for mold sporeswithin 24-48 hours, making removal essential rather than optional.
Remove and discard wet drywallat least 12 inches above the water line, and replace all affected insulationas it loses R-value and structural integrity once saturated.
Porous vs. Non-Porous
Materials in your home respond differently to water damagebased on their porosity. Porous materialslike drywall, carpeting, and upholstered furniture absorb water deeply, making them difficult to salvageonce saturated.
Non-porous surfaces such as metal, glass, and sealed countertops can typically be cleaned and disinfected effectively.
When evaluating water-damaged items, consider:
- Timeframe – Items wet for over 48 hours likely harbor mold growth
- Saturation level – Completely soaked porous materials rarely dry completely
- Contamination type – Items exposed to sewage or floodwater require disposal regardless of porosity
You’ll need to make tough decisionsabout what to keep and what to discard.
While non-porous materials can often be saved with proper cleaning, heavily saturated porous materials typically need replacement to prevent ongoing mold issuesin your home.
Drywall and Insulation
Water-damaged drywall and insulation represent critical removal priorities after flooding, as these materials quickly become breeding grounds for toxic mold.
You’ll need to cut and removedrywall at least 12 inches above the water line, even if it appears dry, as capillary action draws moisture upward.
Don’t attempt to salvage wet insulation—whether fiberglass, cellulose, or foam—as it loses its R-value and harbors mold spores.
When planning drywall replacement, consider using mold-resistant productswith moisture barriers for areas prone to humidity.
Different insulation types offer varying resilience to water; closed-cell foam insulation provides better moisture resistance than traditional options if you’re rebuilding.
Document all removed materials with photographs before disposal for insurance claims, and always wear protective equipmentduring removal to prevent exposure to contaminants.
Thoroughly Dry All Structural Components
The structural integrityof your home depends heavily on the complete drying of all building components after water damage.
Water damage restoration requires thorough drying of all structural elements to preserve your home’s integrity and safety.
You’ll need to address hidden moisturein joists, studs, sill plates, and subflooring to prevent mold colonizationand structural weakening. Effective moisture controlrequires both specialized equipment and methodical approach.
To properly dry structural components:
- Use moisture meters to measure water content in wood beams and other materials—continue drying until readings match normal levels (typically 12-16% for wood).
- Position commercial-grade dehumidifiers and air movers strategically to create airflow patterns that reach concealed areas.
- Remove baseboards and drill small holes in drywall to allow air circulation inside wall cavities.
Don’t rush this critical step—structural components often require 3-5 days of continuous drying, even after surfaces appear dry.
Complete moisture removal now prevents costly structural repairsand health hazards later.
Clean and Disinfect All Affected Surfaces
After structural drying, you’ll need to thoroughly clean affected surfaces with soap and water to remove residual contaminants that can feed mold growth.
Select EPA-registered disinfectantsspecifically formulated for mold prevention, following manufacturer’s instructions for proper contact time and application methods.
Don’t forget to address concealed areaslike behind baseboards, inside wall cavities, and under flooring where moisture and contaminants can harbor mold spores.
Deep Clean All Areas
Once you’ve removed all saturated materials and thoroughly dried the affected areas, deep cleaningbecomes essential to eliminate mold sporesand prevent future growth.
Advanced cleaning techniques must reach beyond visible surfaces to address microscopic contaminantsthat conventional cleaning misses.
For effective mold prevention, thoroughly clean:
- HVAC systems and ductwork where spores commonly circulate throughout your home, creating new colonies in previously unaffected areas
- Behind cabinets, baseboards, and trim using appropriate disinfectants specifically formulated for mold remediation
- Porous materials like upholstery, curtains, and carpets with professional-grade extraction equipment and anti-microbial treatments
Don’t rely on standard household cleaners for water damage restoration.
Commercial-grade disinfectants containing quaternary ammonium compounds or hydrogen peroxide solutions provide superior results without promoting resistance in surviving mold colonies, ensuring your deep cleaning efforts create a truly inhospitable environment for future growth.
Choose Proper Disinfectants
Selecting appropriate disinfectantsstands as your critical line of defense against persistent mold growthafter water damage. Not all cleaning agents effectively kill mold spores or prevent their return.
For non-porous surfaces, EPA-registeredantimicrobial products containing quaternary ammonium compoundsprovide excellent protection, while chlorine bleach(1:10 dilution) works effectively on non-porous materials that won’t discolor.
When considering application methods, always follow manufacturer instructions precisely. Spray applications work best for walls and ceilings, while immersion techniques suit smaller items.
For carpets and upholstery, specialized fungicidal solutions designed for fabric treatment prevent moisture retention.
Remember that hydrogen peroxide(3% solution) offers a less toxic alternative for sensitive areas where bleach fumes may cause issues.
Always test disinfectanttypes on inconspicuous areas first to prevent unexpected damage to your materials.
Tackle Hidden Spots
Water damage creates ideal breeding grounds in areas you can’t easily see, making hidden spot treatmenta critical extension of your disinfection strategy. Focus on concealed spaces where moisture lingersundetected, often becoming problematic mold coloniesbefore you notice visual signs.
To effectively address these hidden corners:
- Remove baseboards and inspect wall cavities using moisture meters to detect dampness that’s invisible to the naked eye.
- Check under and behind cabinetry, appliances, and furniture where air circulation is limited and moisture can remain trapped.
- Investigate HVAC systems, including air ducts and vents that can harbor moisture and distribute mold spores throughout your home.
Don’t assume surfaces are dry simply because they appear so—hidden moisture requires specialized detectionand targeted treatmentto prevent future mold issues.
Monitor Moisture Levels With Testing Tools
To effectively combat mold growth after water damage, you’ll need to implement a systematic approach for monitoring moisture levels throughout your property. Invest in quality testing equipment like moisture meters for structural materials and humidity sensors for ambient air conditions. These tools provide objective measurements that reveal problems before visible mold appears.
| Device Type | Application | Ideal Readings |
| Moisture Meters | Wood, Drywall | Below 15% moisture content |
| Humidity Sensors | Indoor Air | 30-50% relative humidity |
| Thermal Imaging | Hidden Moisture | Uniform temperature patterns |
Establish a regular testing schedule focusing on previously affected areas and susceptible locations like basements and bathrooms. Document your readings to track drying progress and identify troubling patterns. If you detect elevated moisture levels, take immediate action by increasing ventilation, adjusting dehumidification, or investigating potential water sources. Remember that consistent monitoring with these technical tools transforms your mold prevention from reactive to proactive.
Inspect Hidden Areas for Water Intrusion
Beyond visible surfaces and moisture meter readings, thorough water damage remediation requires systematic inspectionof hidden areas where moisture can silently accumulate. Hidden leaksoften develop behind walls, under flooring, or within ceiling cavities, creating perfect conditions for mold growth.
Invisible moisture lurking behind surfaces remains the primary culprit in failed remediation efforts and persistent mold problems.
You’ll need to carefully examine these moisture trapsthat aren’t immediately obvious during initial assessments.
Focus your inspection on these critical areas:
- Wall cavities behind baseboards and electrical outlets, which can harbor significant moisture even when exterior surfaces appear dry
- HVAC ductwork and surrounding insulation where condensation frequently collects
- Crawlspaces and attics where poor ventilation creates ideal conditions for persistent dampness
Don’t rely solely on visual inspection—use your hands to feel for dampness in accessible areas and look for secondary signs like warping, discoloration, or musty odors.
Remember that addressing these hidden moisture sources is often the difference between successful remediation and recurring mold problems.
Apply Mold-Inhibiting Products Where Appropriate
Once drying is complete, strategic application of specialized mold-inhibiting productsprovides a critical defense layer against future fungal growth.
Consider using EPA-registered antimicrobial solutionson susceptible surfaces like drywall, subflooring, and wooden structures. These products disrupt mold’s ability to establish colonies and reproduce in previously wet areas.
When implementing mold prevention techniques, always wear appropriate protective equipment—gloves, masks, and eye protection—as these chemicals can irritate skin and respiratory systems.
Apply products according to manufacturer instructions, paying particular attention to coverage rates and dwell times for maximum effectiveness.
For long-term protection, incorporate mold-resistant primersbefore repainting affected areas. These specialized coatings contain fungicides that continue working long after application.
In high-humidity spaceslike bathrooms and basements, consider product application methods that guarantee complete coverage of corners, joints, and hidden surfaces where moisture might accumulate.
Don’t forget to treat adjacent areas that may have been exposed to elevated humidityduring the drying process.
Know When to Call Professional Remediation Services
While DIY mold prevention measurescan address minor water damage, recognizing when the situation exceeds your capabilities is essential for effective remediation.
Professional services offer thorough mold assessmenttechniques and specialized equipment that aren’t available to homeowners.
Professional mold remediation provides assessment tools and specialized equipment beyond the average homeowner’s reach.
You should contact remediation experts immediately if:
- The water-affected area exceeds 10 square feet or involves contaminated water (sewage, flooding)
- You’ve discovered hidden mold behind walls, under floors, or in HVAC systems
- You or family members experience respiratory symptoms after water damage occurs
Professional remediation options include containment strategies, advanced drying techniques, and complete mold removal that prevent cross-contamination throughout your home.
They’ll also identify and address the underlying moisture sources that DIY approaches might miss.
Don’t hesitate to call professionals when water damage is extensive—the cost of remediation services is typically less than repairing structural damage from untreated mold growth.
Frequently Asked Questions
Is Homeowner’s Insurance Likely to Cover Water Damage and Mold Remediation?
Your insurance coverage likely includes water damage but often contains mold exclusions. You’ll need to check your policy details, as many insurers limit or exclude mold remediation entirely.
How Long Should Fans and Dehumidifiers Run After Water Damage?
Run fans and dehumidifiers 24/7 until all surfaces read completely dry, typically 3-7 days. Maintain ideal dehumidifier settings at 40-50% humidity and position fan operation for maximum airflow across wet areas.
Can I Stay in My Home During Water Damage Cleanup?
You can stay home during minor cleanup, but severe water damage safety concerns require evacuation. Assess contamination levels, electrical hazards, and structural integrity. Follow cleanup precautions by wearing protective gear.
How Much Does Professional Water Damage Restoration Typically Cost?
Professional restoration costs typically range from $1,200-$5,000, depending on damage extent and category. You’ll need to document everything thoroughly for insurance claims to maximize your coverage.
Are Some Mold Species More Dangerous Than Others?
Yes, certain mold species are considerably more dangerous. Toxic mold like Stachybotrys (black mold) poses serious health risks compared to common varieties. Professional mold identification is essential when evaluating potential hazards in your home.
Final Thoughts
When it comes to mold prevention after water damage, timing is everything. Acting within the first 24–48 hourscan mean the difference between a quick cleanup and a full-scale remediation. Remove standing water immediately, use dehumidifiers to maintain indoor humidity between 30–50%, and thoroughly dry every affected surface — including hidden spaces behind walls and under flooring. Discard saturated materials that can’t be salvaged, and always clean with EPA-approved disinfectants to stop spores before they spread.
Even with diligent efforts, some water damage situations are too extensive for DIY solutions. When the affected area exceeds 10 square feet, involves contaminated water, or moisture lingers in structural components, it’s time to call the professionals.
For reliable, 24/7 assistance, contactAll Dry Services of North Las Vegas— experts inwater damage restoration,mold removal and remediation, andleak detection. Their certified technicians use industry-leading drying equipment, moisture monitoring tools, and provenflood damage cleanupmethods to restore your property quickly and safely.
If your home has lingering odors or contamination from a recent water event, their team can also help withodor removalandfire damage restorationto ensure a complete return to normalcy.
Don’t wait for mold to take hold — callAll Dry Services of North Las Vegastoday at 702-213-7391orrequest a free estimate online. Acting fast not only protects your property but also safeguards your family’s health and peace of mind.